
Lepinja Bread Pizza Recipe (Flatbreat/Thincrust Pizza)
Have Pizza – Play Anno
To kick off the launch of our new website, I thought I’d give everyone a recipe. I worked with the layout of this forever. Number steps are the justified to the right margin. Ingredients are put in as you go to force you to read the whole thing or at least scan it before you start mixing.
For those of you who are not southern Slavic, Lepinja is a pretty standard bread. Dome shaped, much wider than it is tall. Shallow channels are cut in a grid pattern of the top. It is of medium density, leavened, with some recipes not requiring dairy.
Believe it or not, there is very little difference between the Lepinja bread grandma made and what I did to some unused dough a few weeks ago. My grandmother’s version and so mine, when done right, does not require ANY flour being added to your rolling pin or rolling surface. Strange but true, it has the consistency of smoothed, clay. Very little if any of the dough sticks to my fingers or my surfaces. THE PROCESS OF THIS IS SUPER SPECIFIC. Even if you are a very experienced baker at least read the specifics of the recipe, they all kind of matter.
The Dough
Wither you are making the tradition Lepinja bread or this flatbread / pizza crust, the dough is the same:
1. Dry Ingredients – In a large bowl mix the (non activated) dry ingredients very well with a whisk:
-6 Cups – All Purpose Flour
-1 1/2 Teaspoon Salt
-2 1/2 Teaspoon Granulated Sugar
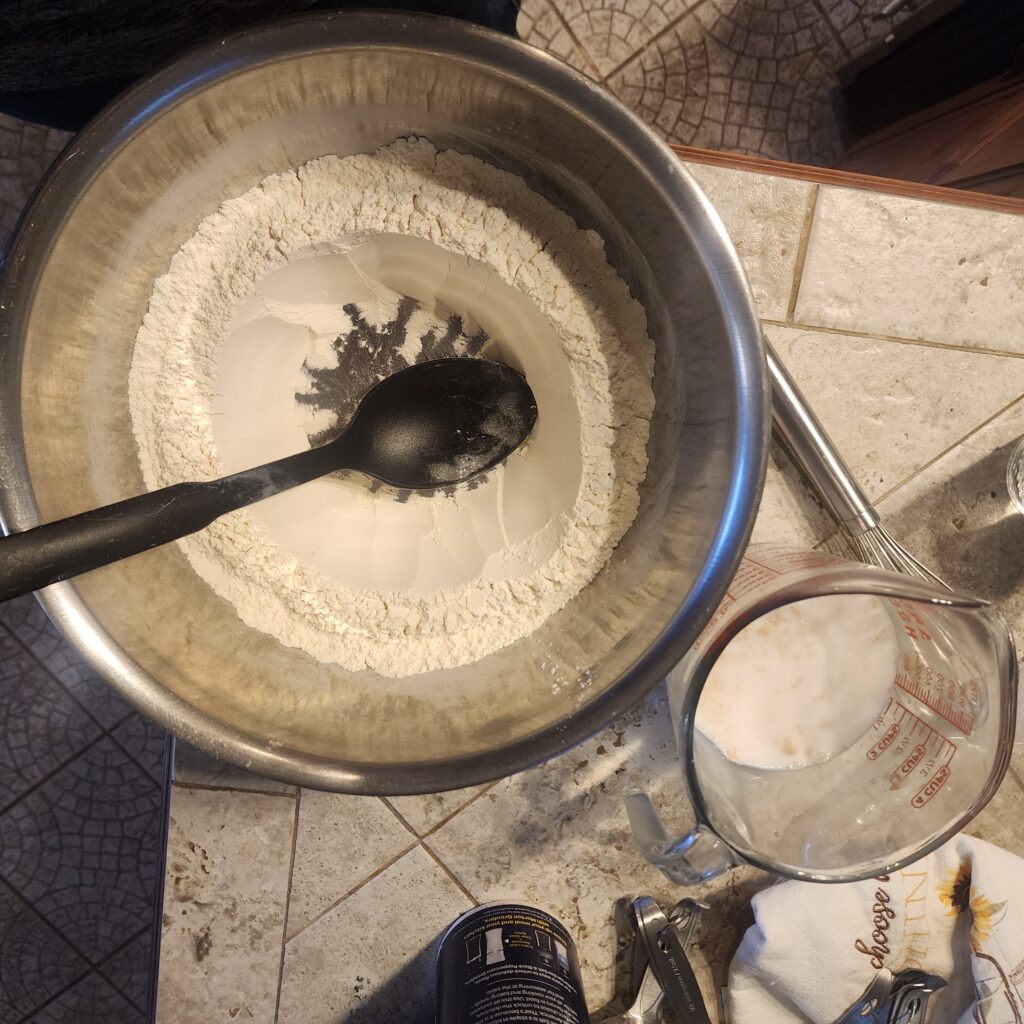
After they are mixed very well, with a baking spoon form a bowl in the surface of the dry ingredients. When the middle is hollowed out, the dry ingredients will form a kind of doughnut shape around the edges of the mixing bowl. You want the hole to be large enough to fit all of the wet ingredients without them overflowing the sides of the bowl you dug.
2. Wet and Active Ingredients – In a larger measuring cup or in a bowl mix well:
-1 1/4 Cups warm water
-1 1/4 Cups warm milk
-2 1/4 Teaspoons (Also the standard size of a packet) – Active Dry Yeast
If you do not bake much and like me you want to know every last detail of things: The Yeast you are putting in the mix is alive. When they hit the liquid they are going to snap to life. The water and milk will give them hydration and sustenance. The liquids’ warmth will keep them warm. Much like a bottle for a baby, it should be quite warm but should not be hot enough that you couldn’t chug it. If you could take a big swig of it without being in pain, they’ll survive. Too cold and they don’t fully wake up or activate.
For those of you with a bit more baking experience, yes even though it is flat, it is important to still raise the dough because it helps maintain a light airy quality even though the dough is rolled out thin and compressed in the process.
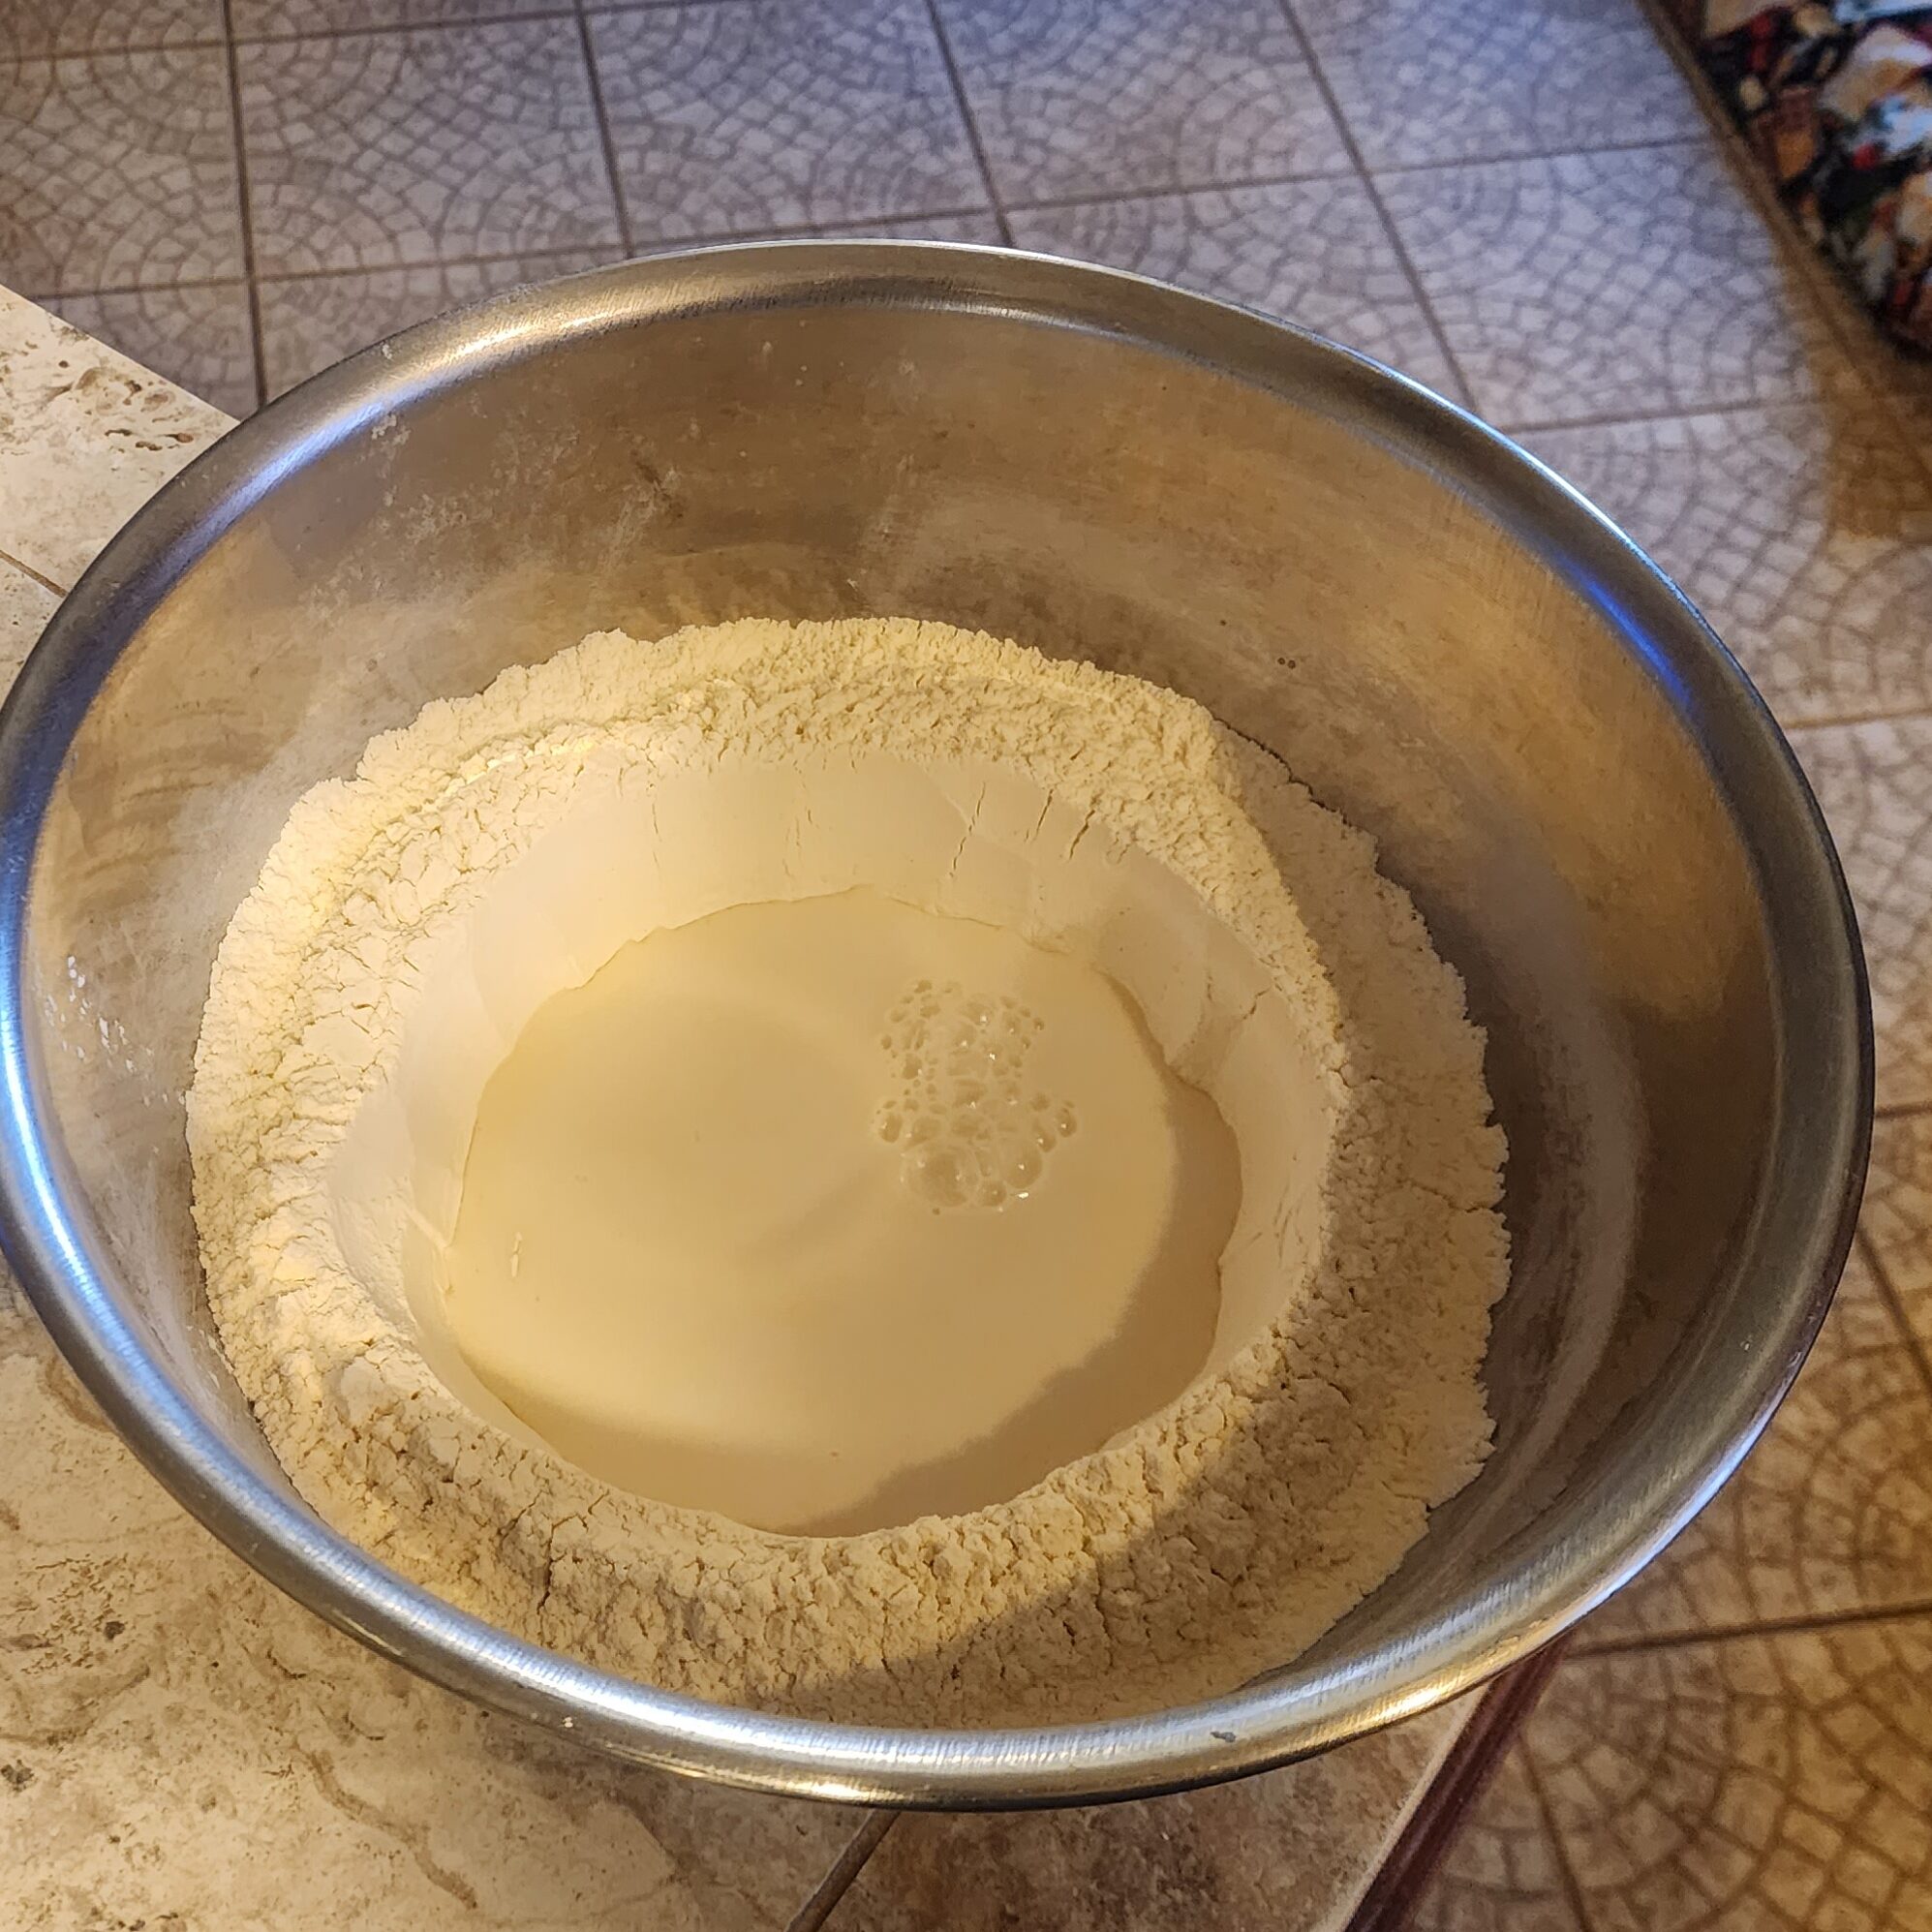
Make sure that you mix the liquids together well before letting them rest for about 10 minutes. The yeast will release more and more gas, which you will see as bubbles on the surface of the liquid. When you see these bubbles really coming up, you’re ready to move forward. If they never do, check to make sure that your yeast remained dry in storage, hasn’t expired and retry the liquid mix.
3. Combine Wet and Dry Ingredients
Dump the Liquids into you’re dug out bowl. And begin mixing by putting a spatula against the wall of your bowl and rotating the bowl. You will scrape the bowl’s wall while pushing the dry ingredients into the center and the liquids. This process will fold the wet and dry together.
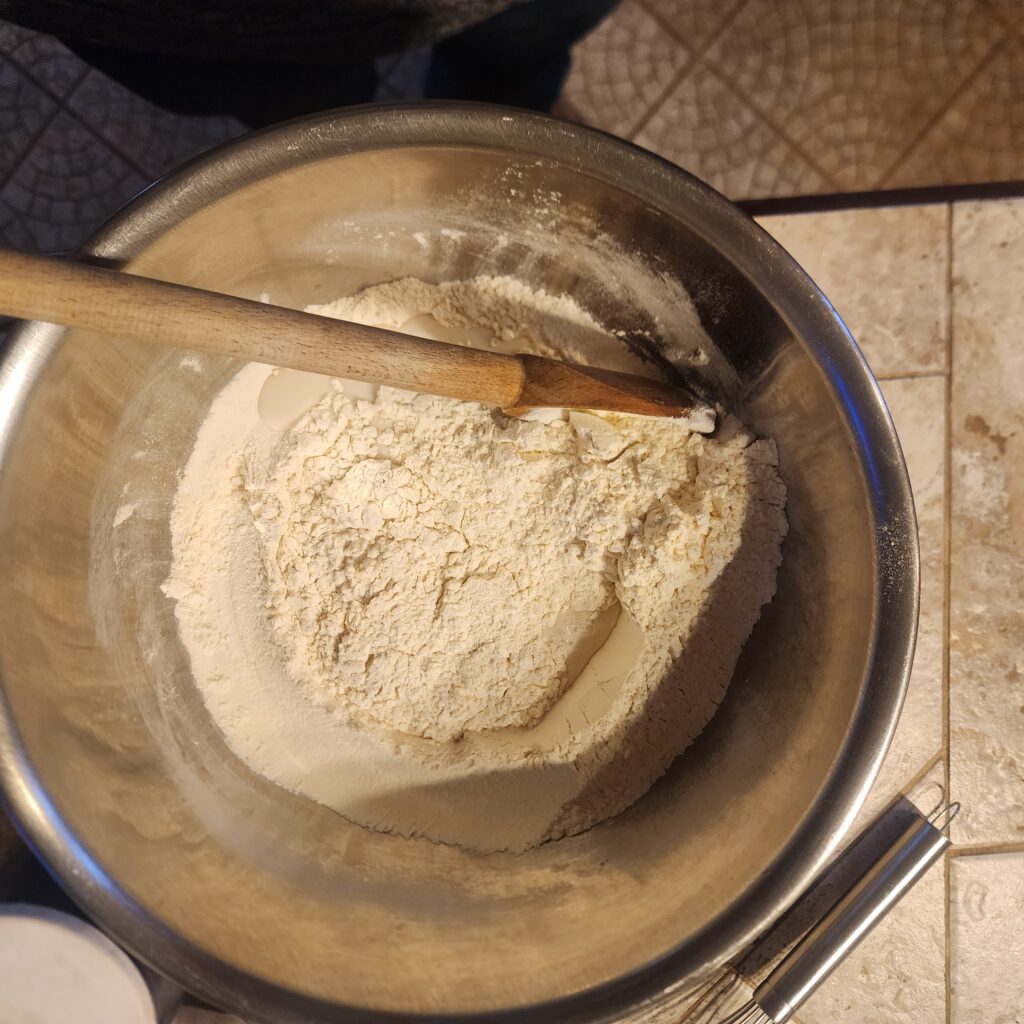
Eventually you will need to move to a thicker wooden spoon and a normal mixing motion. It will take a few minutes of good kneading to get the mixture homogeneous all the way through. Don’t skip on this. Consistency is critical in all baking.
4. When it is uniform and consistent
the dough should still be slightly drier than you’d imagine. That ok the last ingredient is:
-2- 1/4 Tablespoons of Olive Oil.
Pour the oil over the dough and repeat the process of kneading the dough until the oil is evenly mixed into the dough. It is done when it have a uniform, slightly rubbery feel. Dough should not stick to your fingers, nor should there be very much stray dry matter. The oil will discolor the dough so it is easier to see where the dough lacks and where it is saturated with the oil.
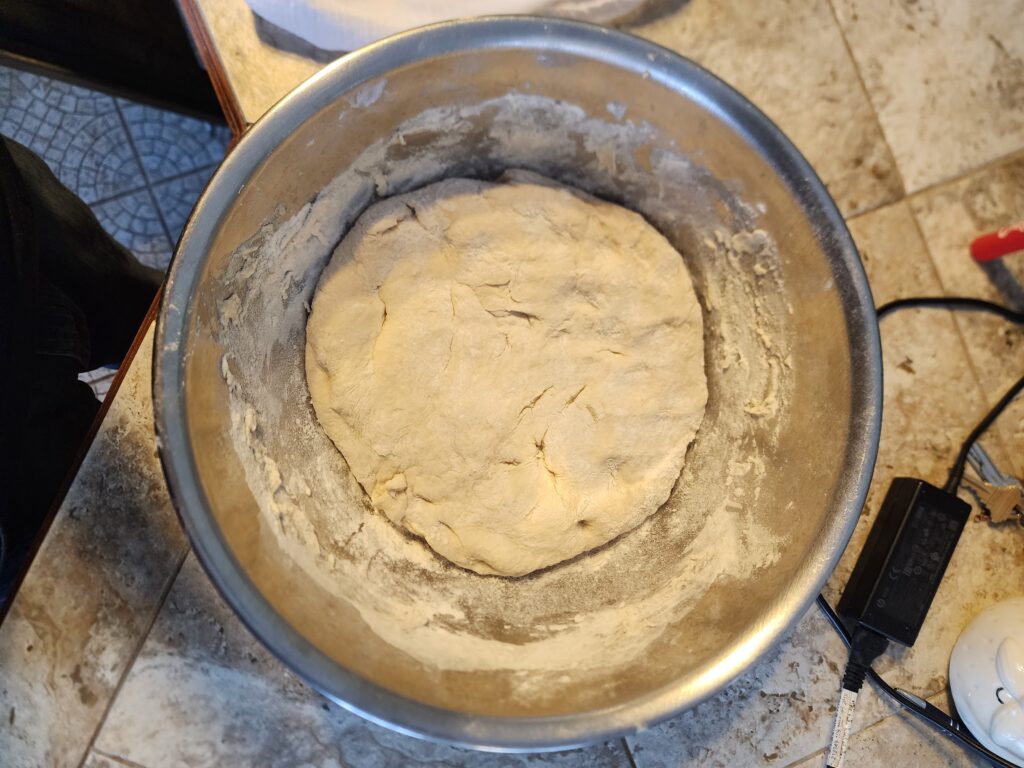
5. Raise the dough – Let the yeast eat in peace.
Dampen a kitchen towel or any other, thinner cloths with warm water. Use it to cover your bowl. Place the covered bowl in a warm area for 1 Hour. If you could get out of the shower and be comfortable, it is about the right temperature for the yeast.
The hour that the dough is sitting in the warmth, it will about double in size. It will become much lighter and fluffier.
Depending on the time of day, it can be as simple as a room that is experiencing a lot of warmth from sunlight coming in. I’ve had luck placing the covered bowl in the sun. Upstairs rooms are often warmer in homes. On one time crunched occasion, I took a hot shower with a covered bowl of dough sitting on a chair. I slipped out of the bathroom quickly to keep the heat from the shower in. The heat wouldn’t last long enough for the whole raising process, but it kept them warm while my wife prepped a place for it.
I have transported raising dough to a family function during the dead of winter. The heater in my truck had no problem blowing enough heat to keep the yeast going. If you can keep an eye on it, the bowl in the sink in a pool of warm water, shallow enough that the bowl doesn’t float, can work. It usually takes up too much space and requires running more warm water and draining the sink every few minutes. It also takes up a lot of important sink space. Usually a dear commodity when the kitchen is being used. Most often, while the Yeast is starting up in the liquid mix, I preheat my oven to 100 F. I then TURN OFF THE OVEN before putting the covered bowl into the oven. It will stay warm even though THE OVEN IS TURNED OFF. If you keep the oven door closed it will stay warm enough for the yeast for the hour.
The Flatbread
After the dough has raised for an hour, you can go the traditional path with the bread, of which there are plenty of awesome recipes out there that can take you the rest of the way from here.
Recently I have been flattening the dough out much more. Rolling out circles, about an 1/4 inch think and about 6 – 12. For pizza I have been rolling it out to 1/8 inch and up to 18 inches.
It began as a way to get myself to eat when I wake up. Usually my vape and coffee suppress the natural hunger that I should be feeling in the morning. To combat this, I prep the dough the night before, raise it then refrigerate it overnight in a slightly moisten, gallon size sandwich bag.
In the morning I can roll out the dough and quickly pan fry up enough flat bread to fill up half a dozen people. No utensils are really needed. Add olive oil for dipping, dried or fresh fruit or jam, it makes a good energy packed but light breakfast that will sound familiar to a lot of cultures. It ruins my morning when I eat heavy and no amount of coffee will overcome the beckoning of my bed.
6. Roll Out Dough
When you pick up the raised dough it should not stick to your fingers. You should be able to work with it easily when it is at room temperature (if you refrigerated it overnight). I take a ball of dough, about the size of a baseball and roll it into a ball. I flatten it and roll it out until it is about 1/4 inch thick. Going from the inside out, I compensate and rotate the circle of dough so that it rolls out in a pretty circular shape. I choose that size because it is about the size of the stove top skillet that I use.
7. In The Oven: 420 F – Preheat with a flat pan on the center rack.
It should go without saying, if you have and know how to use a pizza stone. It works for the flatbread and the pizza. It takes only a few minutes, 5 – 8 for me. It is optional in the oven but you can flip the bread about halfway through.
Flip after about 3 – 4 minutes or until it looks cooked on the bottom. The other side will take about a third of the time to cook. Place on a suitable plate. Repeat the process, changing the oil when the debris in the oil builds up or it burns off. If you cannot cook several breads in a row without the oil disappearing, your running your stove too hot.
Stack and serve!
The Flatbread Pizza
9. To make your flatbread into a pizza roll out the dough about half the thickness, about 1/8 inch. You can play with the amount of dough you start rolling out to find the size pizza you are looking for diameter wise. You can roll up the edge of crust a bit, even pinch it together to form a ring of crust. From there add your toppings and cook like you would the flatbread in the oven. Just don’t flip it or cook it in the pan like you would the flat bread.
10. I cut up the toppings and prep the sauce while the dough is rising. The benefit is, you can make an assembly line of rolling out dough, putting on the toppings, placing it on a preheated pan and switching between two pans. You prep one pizza while the last one is cooking.
I first made a pizza this way when snowed in last month. I saw too many pizza commercial in a row. I had a huge chuck of left over dough from breakfast, decent tomato sauce from a jar with some spice rack supplements, half block cheese cut to thinnish strips, diced up onion and pepper and sliced sausages as quasi pepperoni.
Several pizza later, I realized I did not feel like a brick was sitting in my stomach. The usual discomfort from a heavy pizza was just not there. It can be difficult to transfer the pizza from the surface you roll it out and top it on and you preheated oven pan. BECAREFUL and THINK OUT all the steps your going to take before making the transfer. I prep the pizza on a lightly greased flat cookie sheet, then slide it onto the preheated pan in the oven. If you try and pick up the pizza with your hand it will stretch and will become messy and impossible to transfer.
When you take it out, take out the whole pan and slide the pizza onto an appropriate surface. Think about the assembly line I referred to earlier and you’ll figure out a good system. You can keep a small crowd of people satisfied, with a full pizza coming out about every 10 minutes. This can be done at a casual but steady pace if you are good at time economics (the son of a son of a line cook) in the kitchen. Once the dough is done, the only real work is rolling it out. From there toppings shouldn’t take too long if they are already prepped.
Play Anno
If you read to here and you have no idea what Anno is and you have just been recipe hunting… like us, follow us on Facebook, Twitter and YouTube anyway! Check out our game, I am so excited to finally be able to offer it to the public!
Anno is a card game, so while you are here, check out the rest of our new website (as of Jan, 2023). If you liked this post, LET ME KNOW! We want to raise brand awareness by providing content that maybe similar to this but from our other contributors on a variety of topics, that like Anno, are evergreen.
Joe Mance
Croatian-American Businessman with professional backgrounds in American civil litigation and N.A.T.O. centric military contracting. Creator of Anno the Card Game and Managing Partner of N.R.B.M. Corp.

